Well as I haven't been down this weekend I thought I would just add a few more images that I had stored on my laptop. For those of you who haven't already seen inside my Anderson Shelter here is what I have done so far. Anthony wanted to be able to play in here so I took an old bench out of my Fathers loft and chopped it in half. I had to construct an extra leg to go on the end of the second bench but that wasn't difficult to do and then I stapled down the end of the fabric covering so that it didn't look a mess.
 Anthony had already found an old rug from the Potting shed and to my surprise it fits perfectly onto the floor as if made for it. I've had a few thoughts about this place and think I may use it to practice plastering before I start on the main house. That way he gets a nicely plastered and eventually painted wendy house and I get the satisfaction of being able to say "I did that!"
 Ahh the sweet sweet smell of burning all my old rubbish! This was the second of what I believe will be many bonfires. They are so therapeutic and I love to watch the flames leap about it's just so hypnotic!
  The workshop! I was quite impressed to find that the workshop grinder still works and has in fact been completely re-wired when the house was done 2 years ago. I have ditched the green net but the spare tiles may come in useful I'm just not sure.


 Our first attempt was a little frantic as we decided to mix 2 bags so that we could cover the whole floor in 1 go! Ooops! the instructions were a little on the frugal side when it came to adding water and the resulting mix was very thick and started to set almost imediatley. After much stressing and quite a lot of rolling the first room was done. The finish was far from level but it achieved the desired effect which was to seal in the nasty Asbestos Vinyl tiles for good. Later we mixed a much thinner solution and washed it over the worst bits so we now have a nice smooth finnish. See below.
 The mix we finally decided was the best was nothing like the instructions. Wickes Latex Levelling Compound 25Kg bags state that they will cover upto 8 1/2m Sq. Mix thoroughly with 5 litres of water. That's a load of cobblers and we ended up with a mix of 1 x 25Kg bag to almost 7 litres water. This gave a liquid with a soupy consistancy which washed over the floor nicely and covered the desired area with very little waste.


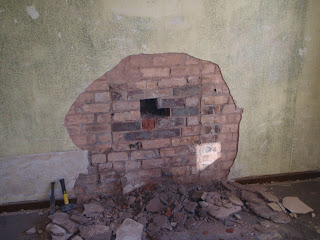
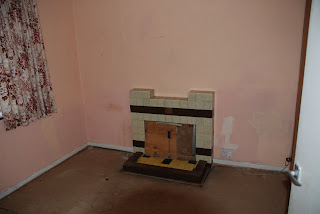
 With the fire surround off we were left with the fire back which was secured by bricks and mortar within the fire place. Now with the help of my dads SDS drill with a chisel bit I chipped out the bricks at the front and then broke the fireback into several pieces. Behind all this was a loose rubble filling which was removed as I went. I had to go buy another roll of sacks to bag all the extra rubble.
  After squaring up the top edge and sweeping out the floor I filled the hole left in the floor with mortar mix and smoothed it to the level of the current floor. Later I will remove all the skirting and throw down a layer of leveling solution across the whole floor. This will not only level my floor but also seal in the Asbestos Vinyl tiles. I'll do this in every room if it works.


